A note before we get started. This site is meant to provide thorough information to make life as easy as possible when LS swapping a Square Body Chevy. To make things even easier, there are links to Amazon Affiliated products should you choose to purchase any we talked about here. Now lets get to the first question asked by folks interested in a C10 LS swap,
What all is needed to put an LS in my C10?
The Basics;
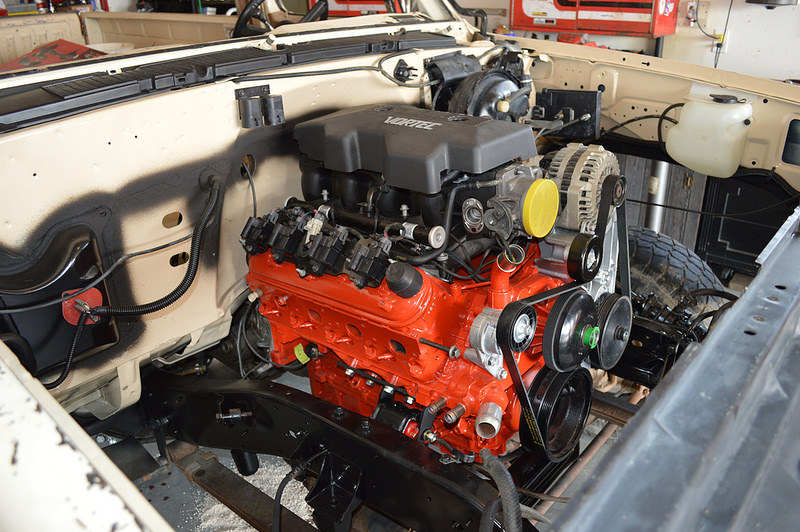
To put an LS engine in a c10 is pretty simple really. All that is needed to actually get the engine bolted into the truck is a set of motor mount adapters. That’s it. You can get them for as little as $25 if you shop around. These adapters bolt onto the engine in place of the factory engine mounts. They generally come with any hardware required.
You will also need a “crank spacer” to support the snout of the torque converter if you plan to keep your original, non LS transmission. These are also very affordable and easy to install. The crank spacer is not needed if using a manual transmission.
That really is it from a bottom line stand point. That would get an LS, into your truck. They say the devil is in the details and that is definitely the case here. There are choices to make and little things to take care of and that’s where it can get complicated. Luckily, at this point there are endless sources of parts, products, and information that pertain to this swap which can make it a lot easier and take the intimidation out of the whole process. Below and in other sections on this site we’ll take a closer look at the details to try and make it easier.
Obviously there is more to a swap than simply bolting the engine into the truck. Things like a wiring harness, sensor adapters, hoses, fuel system etc. We’ll cover all of it.
Back to the beginning. Engine mounts.

There are endless companies offering conversion engine mounts for this swap. All you have to do is type “ls swap mounts” into google to see what I mean.
For a c10 swap there are a couple things to consider when choosing the right mounts for you. There are some mounts which allow for the stock LS air conditioning compressor to be kept in its original location low on the passenger side of the engine. These mounts typically mount the engine in a different location relative to stock for a c10. Usually they mount the engine forward and upward from stock. Other mounts put the engine in essentially the stock location. This means the center line of the crank does not move up or down and the transmission stays exactly as it was before. In order to use the mounts that move the engine to keep the stock LS A/C compressor, you will have to deal with a few issues to go along with the benefits. The biggest issue is needing to get a new driveline built due to moving the engine/trans so far forward. Depending on your budget, this is either a good or bad thing. Always nice to have new driveshaft! But is the added cost in your budget? The other issue is that the stock mechanical cooling fan cannot be used. Instead, only electric fans can be used. This goes back to budget. Electric fans are great, but can you afford them? Another benefit to these mounts is increased oil pan clearance. In many cases this can be a non-issue. However for lowered trucks this can be a real benefit.
The mounts that mount the engine in the stock location alleviate these issues while providing a trade off. Mainly that the A/C compressor typically will not fit in the stock location. If you want air conditioning in your truck you will need to get an aftermarket A/C compressor bracket. Using an aftermarket A/C compressor bracket will also typically not allow for the stock air intake tube to be used as they would be occupying the same space. An aftermarket intake tube would help to resolve that issue.
With those considerations the direction you go is up to you. Think of which direction your budget allows and what your desired outcome is for your build. The adapters that leave the engine in the stock location are by far the most common and most affordable.


Transmission crossmember;

Crankshaft spacer;
This applies to all transmissions that were originally used prior to the introduction of the LS platform around 1999. So your th350, th400, 700r, early 4l60e, early 4l80e, etc, will need to have one of these crank spacers. “crank spacer” is a bit of a misnomer. The only purpose of this spacer is to artificially extend the rear of the LS engine’s crankshaft. The reason for this is the rear of the LS crankshaft being 1/2″ shorter compared to the old style engines like a 350/454. The transmissions that come with the LS engines use a torque converter with a longer “snout” to make up this difference allowing for proper torque converter support in the back of the crankshaft. Failure to use one of these crankshaft spacers with an old style trans (th350/th400/etc) would result in a torque converter that is not properly centered which could cause serious damage.
Again there are different styles. One simply presses into the rear of the crankshaft. This style is super simple to install and extremely affordable. The other is a little more substantial and is a part originaly developed and used by GM themselves. This style bolts onto the crank using the flex plate bolts. IT requires the original flexplate bolts to be removed and discarded. Then you bolt the spacer on using new, longer bolts. These days the press in style seems the most popular. The bolt on style could be argued to be stronger and more reliable, but either are generally fine to use.
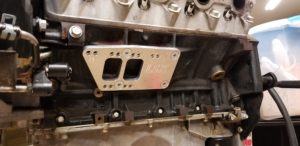
Speaking of flexplates, Action will need to be taken if using the old style trans/torque converter. The bolt pattern is a bit different on the new vs. the old. The new style has the same three or six bolt arrangement but the diameter of the bolt pattern is bigger on the LS flexplate. To solve this issue there are a couple options. One method is to simply slot the flex plate holes towards the crank center using something like a Dremel tool or similar. It’s been done by a lot of people and seems to generally not cause any problems. A more ideal option would be to buy a new conversion flex plate. They are affordable and you get the benefit of having a new flex plate!


That is a quick run down of getting the engine in, bolted down, and mated to the trans. Next we’ll cover more of the small details such as stand alone harnesses, gauges, exhaust etc.
Stand alone harness.
In order to get the engine running in your truck, you will need a harness. There are a few options here. A stand alone harness is one that is set up to run the engine outside of the vehicle the engine originally came in. Several companies offer complete brand new harnesses that are configured for stand alone operation. These generally range from about $500-$750.


There are several companies that offer to convert your harness that you might get with your engine into a stand alone configuration. With this type of service you generally will box up your harness and send it in for it to be worked on and the company will ship it back to you when they are done. Price for this service seems to range from about $250-$450.
LSXPDX.COM Also offers this service as well as DIY Fuse Blocks.
Finally, you can convert your harness yourself. Total cost, depending on what choices you make along the way ranges from about free to as much as $250. Commonly, it runs about $75. This cost is for a new fuse block, some wire, connectors, and new wire loom. This is by far the most common route when doing a C10 ls swap.


Sensors and Sensor Adapters.
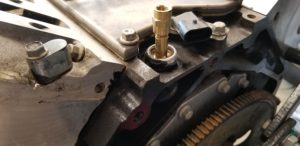
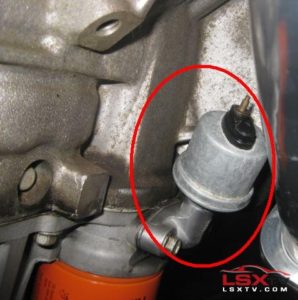
Next up are sensors/adapters needed to use your stock water temp and oil pressure gauges. First the oil pressure sensor. The stock LS oil pressure sensor is on the top of the block, behind the intake manifold. Typically one will remove this stock sensor (this special tool will help a lot!) and install an adapter to go from the stock metric size on the engine, to the 1/8”npt thread on the stock C10 oil pressure sensor. With this adapter, you simply install the adapter in place of the ls oil pressure sensor, and then thread your stock C10 oil pressure sensor into the adapter, connect the C10 oil pressure sensor wire (or line if using a mechanical oil pressure gauge like is found on earlier C10s and many after market oil pressure gauges) and you’re done.

If you’re into DIY and on a budget, you can accomplish the same thing for essentially free. You can remove the LS oil pressure sensor, break off the plastic portion, and then drill and tap the remaining “base” to the 1/8”npt required for the C10 oil pressure sensor. This achieves the same results, for free, but you have to be willing and able to drill and tap the original sensor base as opposed to removing the sensor and simply installing an adapter.

Some C10s have a larger oil pressure sending unit. These larger style sending units can be difficult to fit behind the intake in the stock location. Options here are to use some kind of angled adapter to place the sending unit in just the right spot.
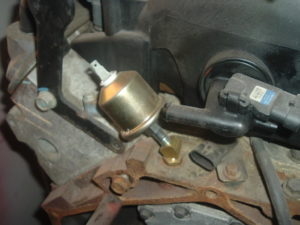
Another common option is to use the oil bypass passage on the side of the oil pan. If you aren’t using the oil cooler lines (on some ls engines) this can be a good option.
Temperature Sensor.
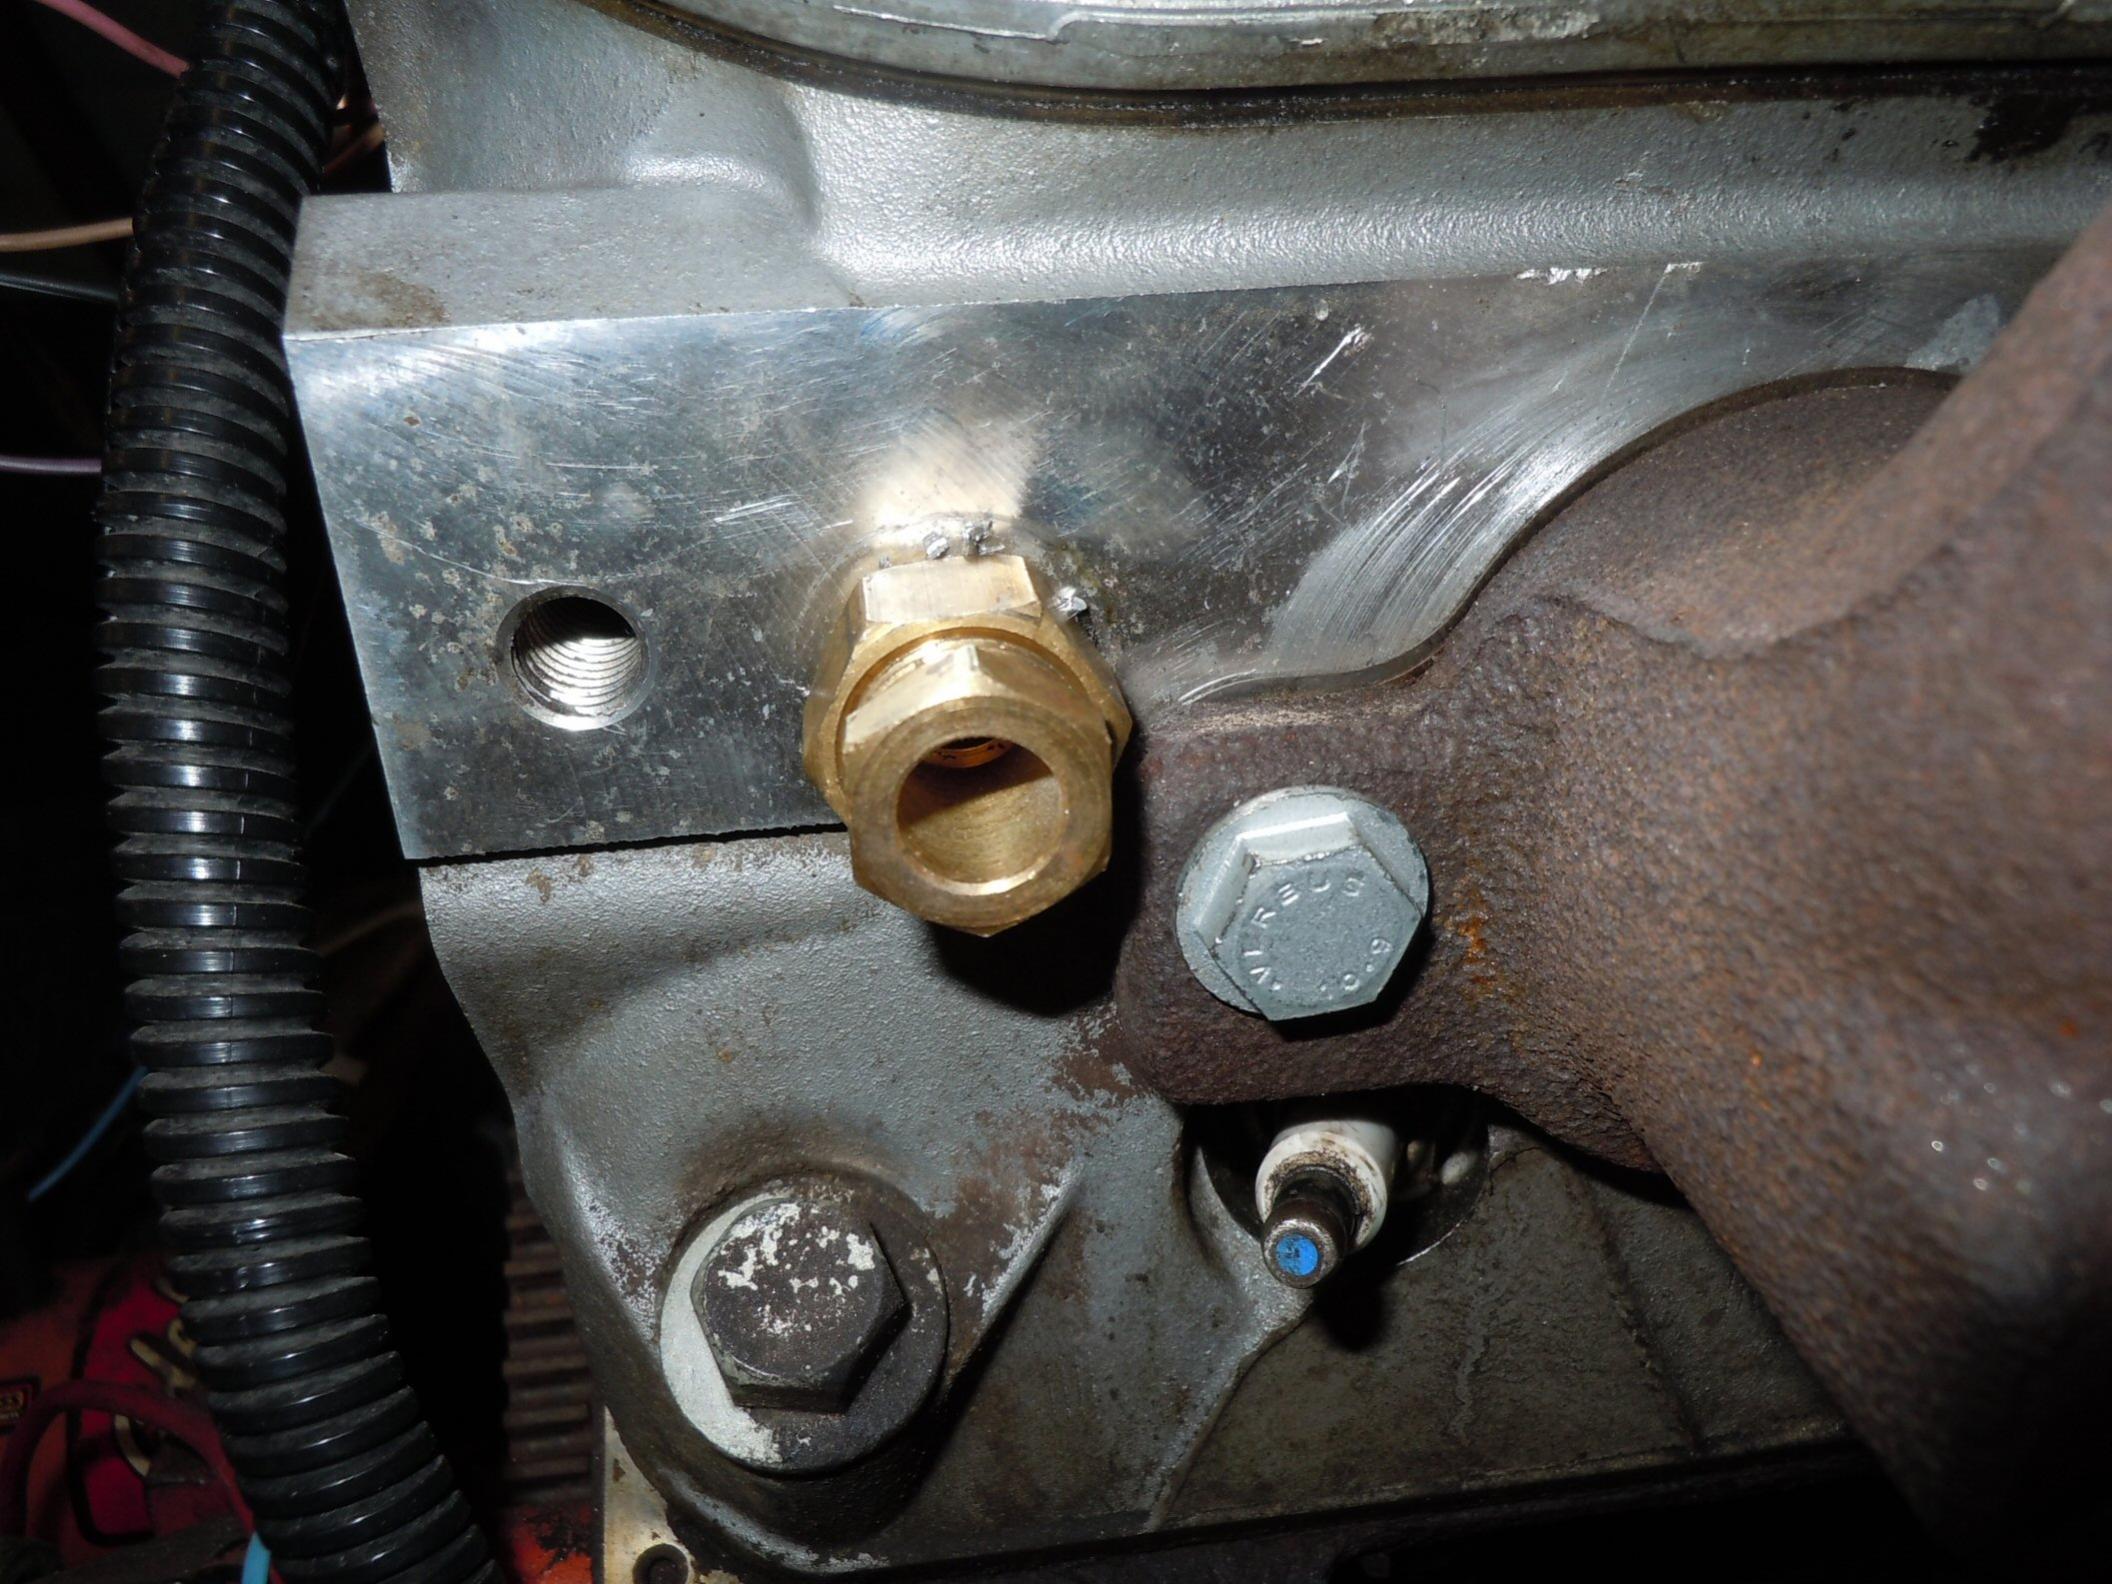
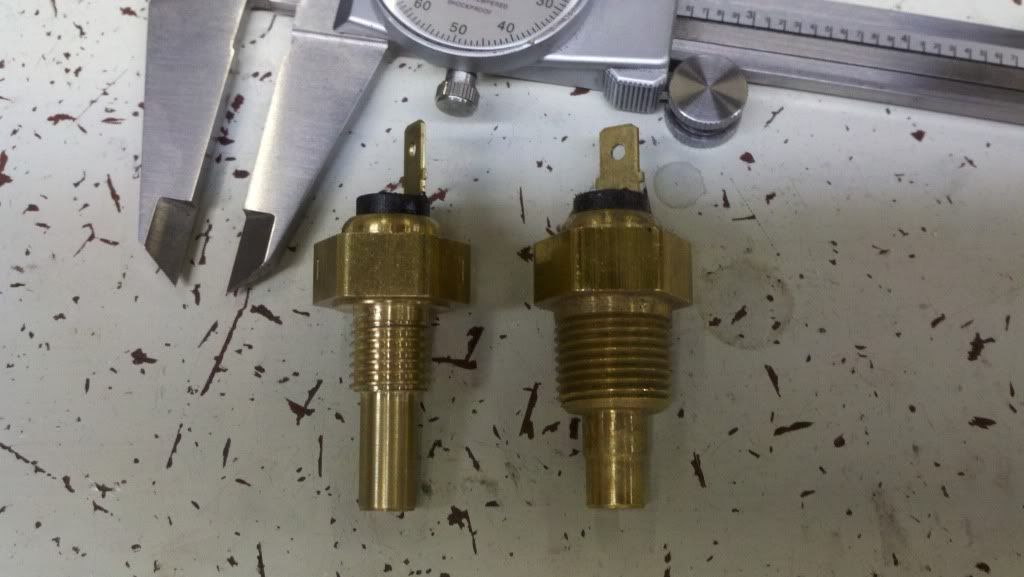
To run the C10 temperature gauge will require on of the following methods. You can get a simple adapter that converts the LS thread to the C10 thread of 3/8”npt. These are very easy and affordable. The issue that makes this option a compromise is that the sensor is pushed so far out from the coolant circulating through the head. This could skew actual temperature readings but many believe the difference in temperature reading vs. actual coolant temperature is not worth worrying about.


Another option is to drill and tap the passenger side head coolant port to the proper 3/8”npt required for the C10 temperature sensor. Many people have done this method repeatedly with good success but many are unwilling to take the risk of messing up their head if something bad happens during the drill/tap process.
If you are very handy, you can put the stock C10 temperature sensor into a lathe and turn down its diameter, and then thread it to M12x1.5 which allows it to be installed directly into the available port in the passenger side head. This method works well but is not something everyone has the ability to do since it pretty much requires a lathe to be done.
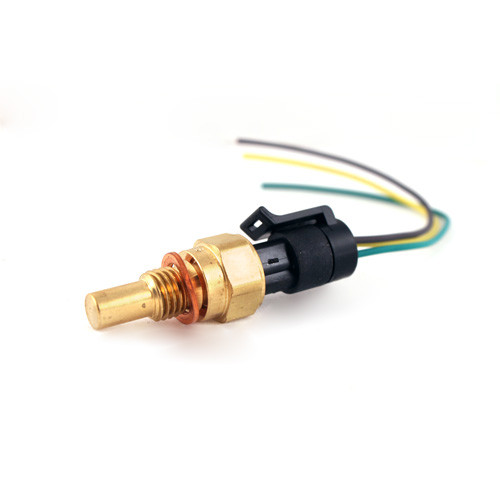
Last there is the three wire temperature sensor. It has dual outputs where the original only has one. It allows the computer to get the temperature as well as feeding the stock C10 temperature gauge. This sensor installs in place of the factory LS temperature sensor. With this sensor you remove the original LS sensor and install the new one in its place. Once that’s done you will need cut off the original temperature sensor connector, splice the new three wire connector into the harness using two wires and run the new third wire to the C10 temperature sensor wire to the gauge. This is a very simple solution. For more info, check out the “three wire temp sensor” page.
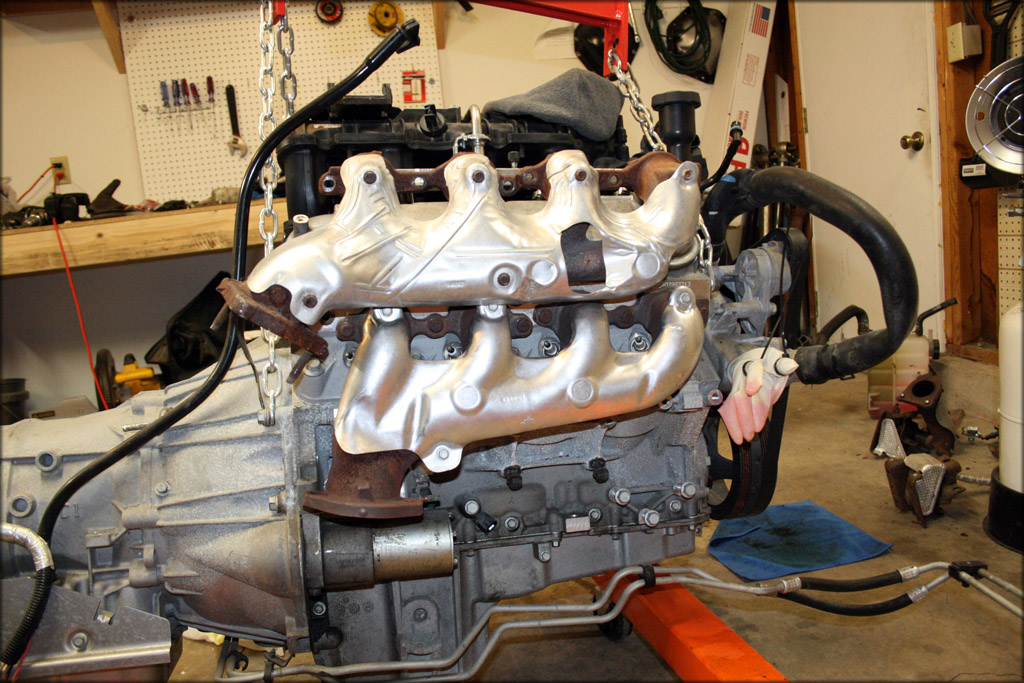
An often overlooked issue is the exhaust. Regardless of the direction of your build, a trip to the muffler shop is nearly a required activity. It can certainly all be done at home in a DIY manor. But lots folks don’t have the ability to do this kind of fab work with cutting, welding, sectioning, etc. Since most swaps tend to be a “truck engine” like a 4.8/5.3/6.0/etc out of a truck, we’ll start there. The stock truck LS manifolds generally DO fit. The problem comes from the down pipes that connect to the manifolds tend to hit the frame. With some modification of the down pipes (cutting and welding). They can almost always be made to work if you’re willing to put in the time. There are other stock exhaust manifolds that will work with less effort. The “F Body” manifolds are common ones that hug a little tighter. There will still need to me modifications made to connect the new LS exhaust to the C10 exhaust. Often times folks will just have a full new exhaust ran at a muffler shop from the LS manifolds on to the back of the truck some place. Check out more on stock manifolds on the “exhaust manifolds/headers” page.
There are many affordable options now for aftermarket headers, LS swap headers, Aftermarket manifolds etc. You can now buy good quality LS swap headers for under $200. Headers at this price are obviously going to be coming from overseas places like China. There are higher quality, american made options out there are well. They tend to run around $500 for these higher quality headers. Regardless of the route you choose to take, you need to know that its going to be an issue that you will need to solve.


Hoses. Vacuum and coolant.
The LS platform makes this area very simple. There is almost no vacuum lines to worry about. Virtually all trucks will have one large vacuum hose going from the back of the LS intake manifold right over to the brake booster unless it’s a truck with hydra-boost brakes. Some trucks use a vacuum line for the HVAC controls in the C10. For this you can use the vacuum port nipple on the passenger side of the intake manifold. On trucks with a th350 or th400 transmission, you’ll also need a vacuum line down to the vacuum modulator on the trans. For this you can tap into either the brake booster vacuum line, or the previously mentioned vacuum nipple. That’s all there is to consider for vacuum.

For coolant, the solutions are nearly as easy. Typically, the radiator hoses are done with stock “truck” upper and lower hoses. Anything along the lines of a 2002 Silverado will work for both upper and lower hoses. For the heater hoses, regular 5/8” and 3/4″ heater hose just as the C10 originally had. If for some reason you are deleting your heater, you can use this cool bypass hose that is U shaped and is 5/8 on one side and ¾” on the other.


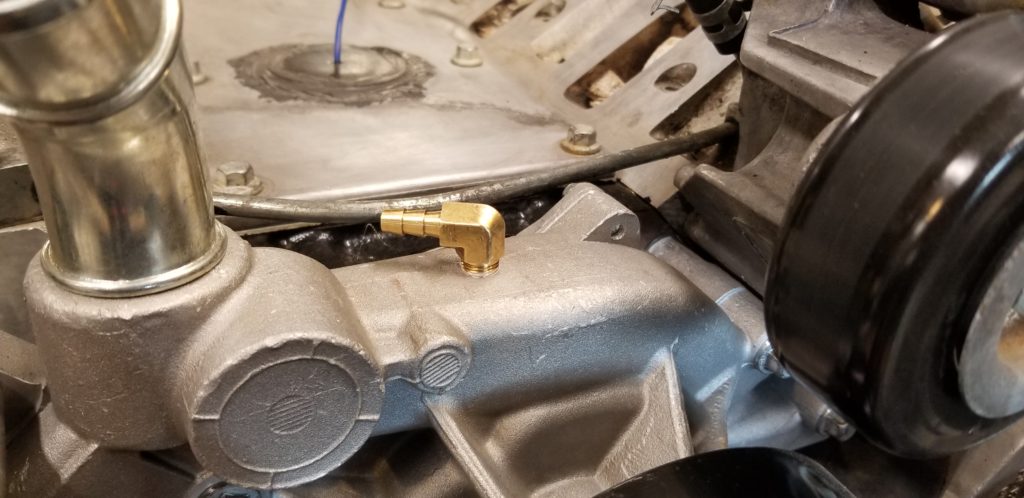
Last is the little ¼” coolant line that passes through the bottom of the throttle body. There are a few ways to solve this one. Originally, the LS engine runs that line straight to the radiator. However, most often, the C10 radiator does not have a port that will work. Instead, there are these common solutions. You can drill and tap the water pump and install a fitting that the hose will go onto. You can get a T fitting that will go into the upper radiator hose and allow the coolant line a place to go.

Cooling.
Generally the original C10 radiator will work perfectly. Often the only modification needed is to cap the old heater hose port on the radiator with one of these.
Cooling fans depend on the motor mounts you choose. Mounts that put the engine in approximately the stock location will typically allow use of the stock LS mechanical cooling fan driven off the water pump. Often even the stock C10 fan shroud can be used. This is the most cost effective method. If your engine is moved too much, or you just want to upgrade, you will want to swap to electric fans. There are a great variety of option here. From the common budget option of the “Ford Windstar fans” which uses a set of fans off a Ford Windstar modified to work in the C10, to fabricated aluminum radiators with custom fan shrouds and fans.
- Coming up;
- Expanded information on each subject!
- Transmission adapting!
- Making More Power!
- Tuning!
- Social Media!
- Product reviews!
- New Pages!
- Product recommendations!